> ## Documentation Index
> Fetch the complete documentation index at: https://docs.fynn.eu/llms.txt
> Use this file to discover all available pages before exploring further.
# Overview
> Create and manage your invoices
Through Fynn's invoice module, you can manage all your invoices, create new invoices, and edit existing invoices. This page gives you an overview of the most important features.
## Creating Invoices
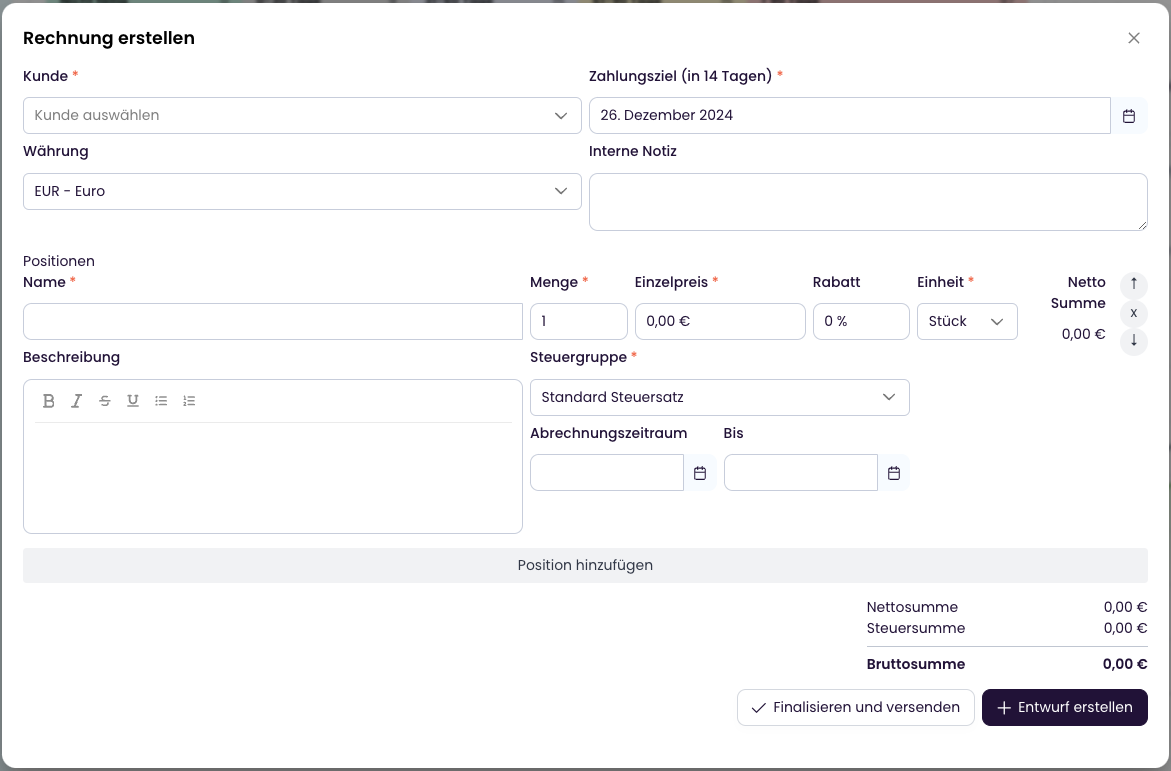
### Manual Invoice Creation
You can manually create a new invoice at any time:
1. Click on the `+` in the top right
2. Select "Invoice"
3. Select the customer
4. Add invoice items
5. Click on `Create Draft` or `Finalize and Send`
 ### Automatic Invoice Creation
Invoices for subscriptions are automatically created at the configured time. Invoicing occurs:
* At the start of a new billing period
* When subscription changes occur (prorated billing)
* For additional charges or credits
### Finalize and Send
After you have created an invoice, you can finalize it and send it to the customer.
The following happens:
* The invoice is generated as a PDF and/or e-invoice XML
* The customer receives an email with the invoice as an attachment, provided notification settings are enabled
* Corresponding journal entries are automatically created
* The invoice is marked with status `Open`
* Payment collection is initiated
* The invoice is sent to [BCC recipients](/en/guide/accounting/introduction#zusaezliche-rechnungs-empfaenger) if needed
## Notifications
### Resend Invoice by Email
You can resend an invoice to your customer by email at any time:
Navigate to the desired invoice in the invoice overview
Click on `Actions` > `Resend`
Use the [Resend Invoice](/api-reference/invoice/resend-invoice) endpoint.
```bash theme={null}
PUT /invoices/{id}/resend
```
The email will then be sent to the customer's registered email address with the invoice as a PDF attachment.
## Activity Log
Every change to an invoice is documented in the activity log. You can find the log directly in the detail view of an invoice in the "History" section. There you can see:
* Who made the change
* What was changed
* When the change occurred
## Payments
Payments can be manually added or retried for invoices. For more details, see [Manage Payments](/en/guide/payments/manage-payments).
## Payment Reminders / Dunning
### Automatic Invoice Creation
Invoices for subscriptions are automatically created at the configured time. Invoicing occurs:
* At the start of a new billing period
* When subscription changes occur (prorated billing)
* For additional charges or credits
### Finalize and Send
After you have created an invoice, you can finalize it and send it to the customer.
The following happens:
* The invoice is generated as a PDF and/or e-invoice XML
* The customer receives an email with the invoice as an attachment, provided notification settings are enabled
* Corresponding journal entries are automatically created
* The invoice is marked with status `Open`
* Payment collection is initiated
* The invoice is sent to [BCC recipients](/en/guide/accounting/introduction#zusaezliche-rechnungs-empfaenger) if needed
## Notifications
### Resend Invoice by Email
You can resend an invoice to your customer by email at any time:
Navigate to the desired invoice in the invoice overview
Click on `Actions` > `Resend`
Use the [Resend Invoice](/api-reference/invoice/resend-invoice) endpoint.
```bash theme={null}
PUT /invoices/{id}/resend
```
The email will then be sent to the customer's registered email address with the invoice as a PDF attachment.
## Activity Log
Every change to an invoice is documented in the activity log. You can find the log directly in the detail view of an invoice in the "History" section. There you can see:
* Who made the change
* What was changed
* When the change occurred
## Payments
Payments can be manually added or retried for invoices. For more details, see [Manage Payments](/en/guide/payments/manage-payments).
## Payment Reminders / Dunning
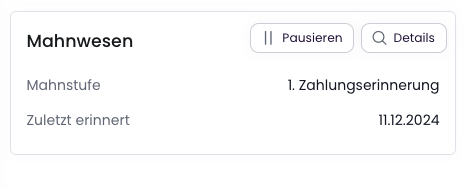 In the dunning overview you can see:
* The current dunning level
* The date of the last reminder
* Option to pause dunning
* Access to dunning process details
You can pause dunning for individual invoices. This is useful when, for example:
* You have agreed on an installment payment plan with the customer
* A payment deadline has been extended
* You are waiting for a pending credit note
When you reactivate dunning later, the next applicable dunning level will automatically be applied.
**Example:**
1. An invoice is 10 days overdue and at dunning level 1
2. You pause dunning for 14 days due to an installment payment agreement
3. After reactivation (day 24), dunning level 2 automatically applies, as the deadline for dunning level 1 (e.g., 7 days) has already been exceeded
For more details, see [Payment Defaults](/en/guide/dunning/introduction).
## Cancel Invoices
An invoice can only be canceled if:
* No payment has been received yet
* For in-house SEPA: The SEPA file has not yet been marked as "uploaded"
Navigate to the desired invoice in the invoice overview
Click on `Cancel`
Choose one of the following options:
* `Yes, cancel`: The invoice will simply be canceled
* `Yes, cancel and duplicate`: The invoice will be canceled and a new invoice with the same items will be created
Use the [Cancel Invoice](/api-reference/invoice/cancel-invoice) endpoint.
```bash theme={null}
POST /invoices/{id}/cancel
```
The following happens during cancellation:
* A cancellation invoice is created that offsets the original invoice
* If [journal entries](/en/guide/accounting/introduction) are enabled, corresponding cancellation entries (e.g., deferred revenue) are automatically executed
* The customer receives a notification by email if this is enabled in the [notification settings](/en/guide/notifications/introduction)
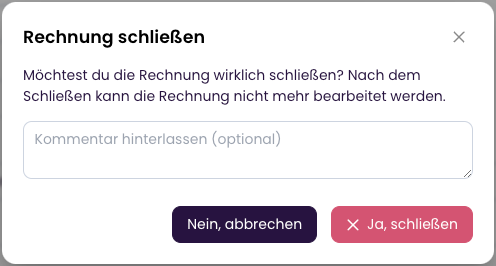
## Close Invoice
To remove invoices from the overview, you can close them. This is useful when you want to archive invoices that are no longer relevant and have not yet been sent to the customer.
Requirements for closing an invoice:
* The invoice is in status `Draft` or `Pending Approval`
Effects of closing:
* The invoice is hidden in the overview
* The invoice can no longer be edited
* The invoice amounts are not included in statistics and reports
* The invoice is logged as "closed" in the activity log
The customer will not be notified about the invoice being closed.
Navigate to the desired invoice in the invoice overview
Click on `Actions` > `Close Invoice`
Confirm closing the invoice with `Yes, close`. Optionally, you can add a note that will be logged in the history.
In the dunning overview you can see:
* The current dunning level
* The date of the last reminder
* Option to pause dunning
* Access to dunning process details
You can pause dunning for individual invoices. This is useful when, for example:
* You have agreed on an installment payment plan with the customer
* A payment deadline has been extended
* You are waiting for a pending credit note
When you reactivate dunning later, the next applicable dunning level will automatically be applied.
**Example:**
1. An invoice is 10 days overdue and at dunning level 1
2. You pause dunning for 14 days due to an installment payment agreement
3. After reactivation (day 24), dunning level 2 automatically applies, as the deadline for dunning level 1 (e.g., 7 days) has already been exceeded
For more details, see [Payment Defaults](/en/guide/dunning/introduction).
## Cancel Invoices
An invoice can only be canceled if:
* No payment has been received yet
* For in-house SEPA: The SEPA file has not yet been marked as "uploaded"
Navigate to the desired invoice in the invoice overview
Click on `Cancel`
Choose one of the following options:
* `Yes, cancel`: The invoice will simply be canceled
* `Yes, cancel and duplicate`: The invoice will be canceled and a new invoice with the same items will be created
Use the [Cancel Invoice](/api-reference/invoice/cancel-invoice) endpoint.
```bash theme={null}
POST /invoices/{id}/cancel
```
The following happens during cancellation:
* A cancellation invoice is created that offsets the original invoice
* If [journal entries](/en/guide/accounting/introduction) are enabled, corresponding cancellation entries (e.g., deferred revenue) are automatically executed
* The customer receives a notification by email if this is enabled in the [notification settings](/en/guide/notifications/introduction)
## Close Invoice
To remove invoices from the overview, you can close them. This is useful when you want to archive invoices that are no longer relevant and have not yet been sent to the customer.
Requirements for closing an invoice:
* The invoice is in status `Draft` or `Pending Approval`
Effects of closing:
* The invoice is hidden in the overview
* The invoice can no longer be edited
* The invoice amounts are not included in statistics and reports
* The invoice is logged as "closed" in the activity log
The customer will not be notified about the invoice being closed.
Navigate to the desired invoice in the invoice overview
Click on `Actions` > `Close Invoice`
Confirm closing the invoice with `Yes, close`. Optionally, you can add a note that will be logged in the history.
 Use the [Close Invoice](/api-reference/invoice/close-invoice) endpoint.
```bash theme={null}
POST /invoices/{id}/close
```
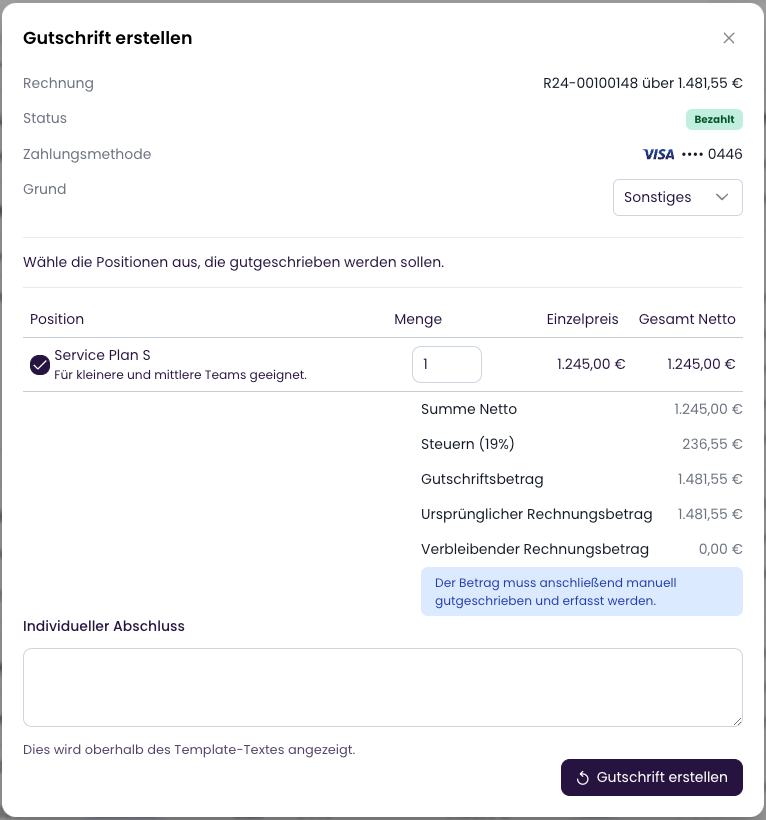
## Create Credit Note
Credit notes can be created for invoices to reduce the invoice amount. This is useful when, for example:
* A discount is granted retroactively
* The invoice amount needs to be corrected
* A product has been returned
To create a credit note, a payment must have already been recorded for the invoice.
Navigate to the desired invoice in the invoice overview
Click on `Actions` > `Create Credit Note`
Select the items and quantities to be credited. You can also add custom text for the credit note,
which will be displayed on the credit note below the items and above the general "closing" text.
The "closing" text can be customized under "Settings" > "Documents" > "Templates" > "Credit Notes".
Use the [Close Invoice](/api-reference/invoice/close-invoice) endpoint.
```bash theme={null}
POST /invoices/{id}/close
```
## Create Credit Note
Credit notes can be created for invoices to reduce the invoice amount. This is useful when, for example:
* A discount is granted retroactively
* The invoice amount needs to be corrected
* A product has been returned
To create a credit note, a payment must have already been recorded for the invoice.
Navigate to the desired invoice in the invoice overview
Click on `Actions` > `Create Credit Note`
Select the items and quantities to be credited. You can also add custom text for the credit note,
which will be displayed on the credit note below the items and above the general "closing" text.
The "closing" text can be customized under "Settings" > "Documents" > "Templates" > "Credit Notes".
 The credit note has been created and the invoice amounts have been automatically adjusted. The credit note is marked with status `Open`.
Subsequently:
* the customer is informed about the credit note (if enabled in the [notification settings](/en/guide/notifications/introduction))
* the credit note is documented in the activity log
* the journal entries are automatically created
The quantity of credited items is deducted from the invoice. The quantity cannot be credited again.
To mark the credit note as `Paid`, you can add a payment corresponding to the credited amount. The amount must be positive.
See [Manage Payments](/en/guide/payments/manage-payments) for this.
Use the [Create Credit Note](/api-reference/invoice/create-credit-note) endpoint.
```bash theme={null}
POST /invoices/{id}/credit-note
```
The credit note has been created and the invoice amounts have been automatically adjusted. The credit note is marked with status `Open`.
Subsequently:
* the customer is informed about the credit note (if enabled in the [notification settings](/en/guide/notifications/introduction))
* the credit note is documented in the activity log
* the journal entries are automatically created
The quantity of credited items is deducted from the invoice. The quantity cannot be credited again.
To mark the credit note as `Paid`, you can add a payment corresponding to the credited amount. The amount must be positive.
See [Manage Payments](/en/guide/payments/manage-payments) for this.
Use the [Create Credit Note](/api-reference/invoice/create-credit-note) endpoint.
```bash theme={null}
POST /invoices/{id}/credit-note
```