Accessibility
The customer portal is accessible by default via the URL[tenant-username].customerfront.app.
Custom Domain
A custom domain can be set up for the customer portal and shopping cart. Send us a short email with your request to hi@fynn.eu.Features
Subscriptions
In the “Subscriptions” section, customers can view their active subscriptions, cancel them, and revoke cancellations. Contract details such as contract start date, contract end date, and the next billing amount are also visible.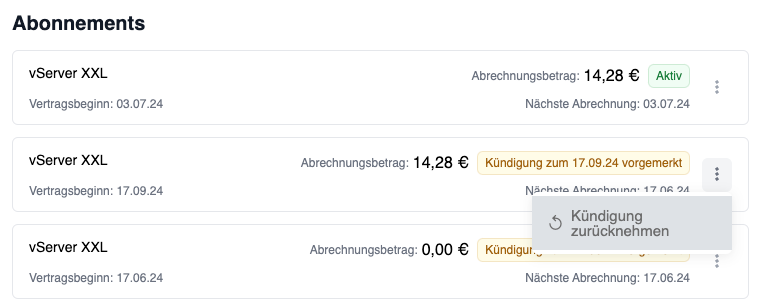
Billing Addresses
In the “Billing Address” section, customers can set a default billing address that will be used for all future subscriptions and invoices. Alternatively, a new billing address can be added.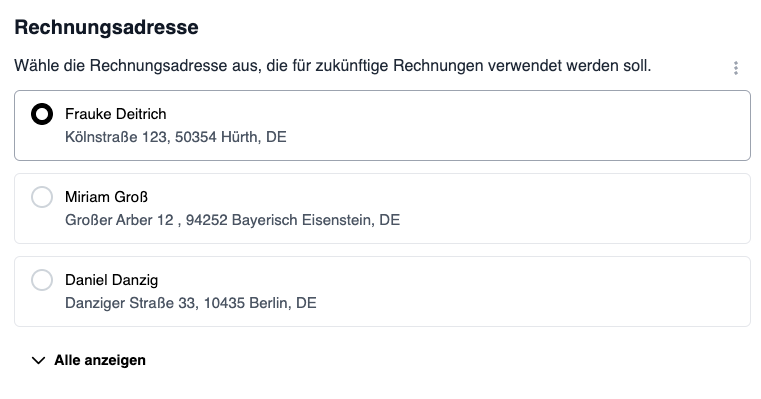
Delivery Addresses
When the delivery address is enabled for your organization, customers can additionally set and edit their own delivery address in the “Addresses” section. If no delivery address is set yet, the default address is used. Customers can create a new delivery address at any time or reset it back to the default address.Editing the delivery address in the customer portal is optional. Send us a short email at hi@fynn.eu if you would like the feature enabled.
Payment Methods
In the “Payment Methods” section, customers can set a default payment method that will be used for all future subscriptions and invoices. Alternatively, a new payment method can be added.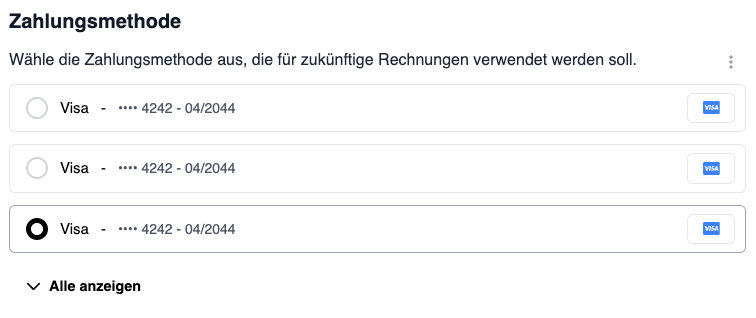
Invoices
In the “Invoices” section, customers can view and download all invoices.
Personal Contact
In the “Personal Contact” section, customers can view their personal contact person. This can be configured under Assign Personal Contact.
Create Customer Portal Link
To direct customers to the customer portal in an authenticated manner, a personalized link can be created.- Using Web App
- Using API
1
Create Link
Click on “Customers” in the left navigation and select the customer for whom you want to create an authenticated link.Click on the three dots in the top right and select “Create Customer Portal Link”.
2
Link Successfully Created
The link has been successfully created and copied to the clipboard. You can now forward the link to the customer.
Send Login Email to Customer
You can send customers an email with a login link that takes them directly to their customer portal - without having to enter a password or code.- Using Web App
- Using API
1
Select Customer
Click on “Customers” in the left navigation and select the customer.
2
Send Login Email
Click the three dots in the top right and select “Send Login Email”.The customer will receive an email with a link to log in directly.
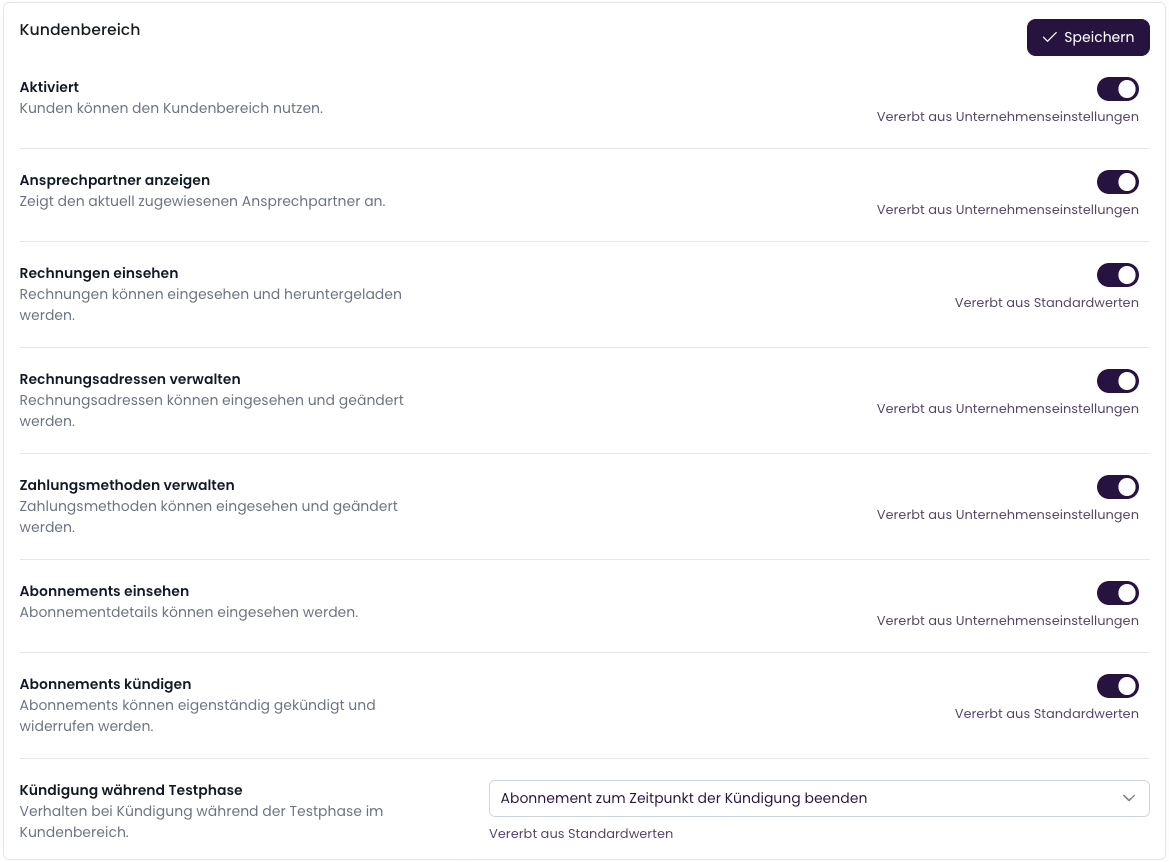
Customize Customer Portal
Individual sections or features can be customized in the customer portal. These include:- Show contact person
- Show invoices
- Manage billing address
- Manage payment methods
- View subscriptions
- Cancel subscriptions
- Behavior when canceling during trial period
Behavior When Canceling During Trial Period
When a customer cancels a subscription during the trial period, the behavior of the cancellation timing can be configured. The following options are available:- End subscription at time of cancellation: The subscription is cancelled immediately, even if the trial period has not yet expired.
- End subscription at end of trial period: The subscription is ended at the end of the trial period, the cancellation is scheduled.
This setting is not relevant for the Wallet, as the cancellation date is manually set when cancelled by an employee.
Add Payment Method via Link
To give customers the option to add a payment method via link, a personalized link can be created and optionally sent by email. The customer can then choose whether the payment method should be used for existing and future subscriptions. Additionally, the payment method will be used for open invoices if the last payment was unsuccessful.The payment method is automatically set as the default payment method.
- Using Web App
- Using API
1
Create Link
Click on “Customers” in the left navigation and select the customer for whom you want to create a link.Click on the three dots in the top right and select “Add Payment Method”.
Select the payment methods the customer can add and whether an email should be sent.Click “Create Link”.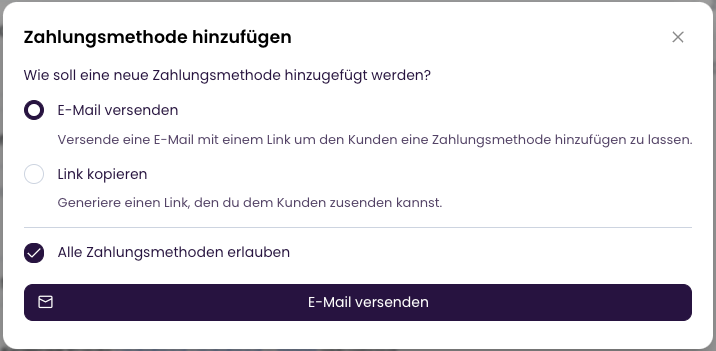
2
Link Successfully Created
The link has been successfully created and copied to the clipboard. You can now forward the link to the customer.