- Text
- Number
- Date
- Selection Options
- Multiple Selection
- List
- Checkbox (Yes/No)
Use Cases
Custom attributes can be used for various purposes, such as:- Storing additional information about customers, such as date of birth, internal customer number, etc.
- Storing additional information about products, such as manufacturer, weight, etc.
- Storing additional information about subscriptions, such as contract number, etc.
- Storing allowed features for a product on the subscription
Create Custom Attributes
1
Go to Settings > General
Scroll down to “Custom Attributes”.
2
Click on 'Create New Attribute'
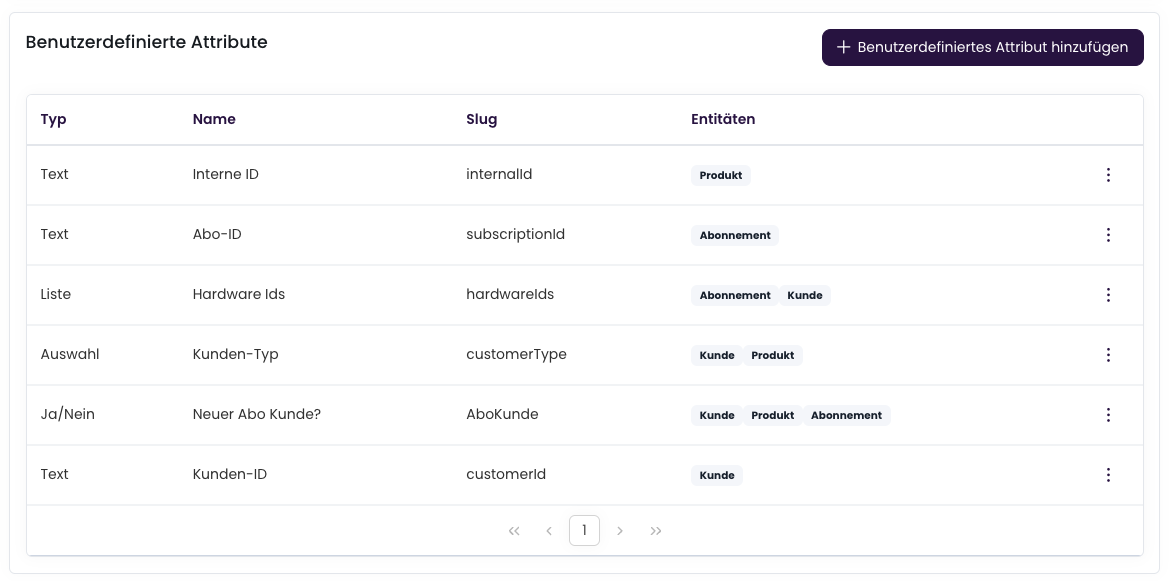
3
Configure Attribute
Configure the attribute according to your requirements.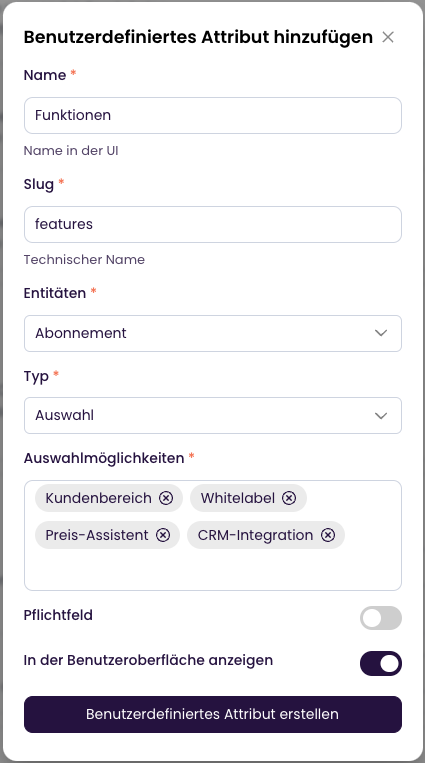
Delete Custom Attributes
If you no longer need a custom attribute, you can delete it. The data will be preserved, but the attribute will no longer be displayed and cannot be edited.Edit Custom Attributes
Custom attributes can be attached to customers, products, and subscriptions. These can be edited in the user interface.
Using the API
Custom attributes can also be set and retrieved via the API. Simply use thecustomFields field in the corresponding objects.
Selection Options / Multiple Selection
By default, the display name is used as the key for both value and display name. If this is not desired, when creating the custom attributes, an array can be passed under thechoices point where value and display name can be defined.
Example JSON Payload